
These easy to make DIY wax sachets will scent your home without chemicals. Perfect to add to closets and drawers. Or make a few as thoughtful gifts!

What Are Wax Sachets?
They are solid air fresheners that look just like a candle. However, there is no wick, so you cannot light a wax sachet. Which is good if you cannot have an open flame, or are worried about pets or children being around candles.

The natural fragrance that is in a wax sachet will escape over time, just like a solid air freshener or unlit candle would. Similar to our no sew rice sachets.
I don’t know why these are known as sachets! The true definition of a sachet is a bag containing potpourri to scent clothes or a closet. But somehow these hanging wax disks have also come to be known as sachets. Go figure.

These sachets are more versatile, though, because you can use them in places where you can’t use a candle, such as:
- Christmas ornaments
- Hanging in a closet
- Car air freshener
- Add to a drawer
- Place in a linen closet
- Hang on a door knob
- Tuck onto a shelf
- Place in a bowl
- Add to a muslin bag and hang
- Gift toppers

How to Make Scented Wax Sachets
If you have ever made candles, you will realize that making wax sachets is very similar. Much of the ingredients are the same. There just is no wick in the wax.
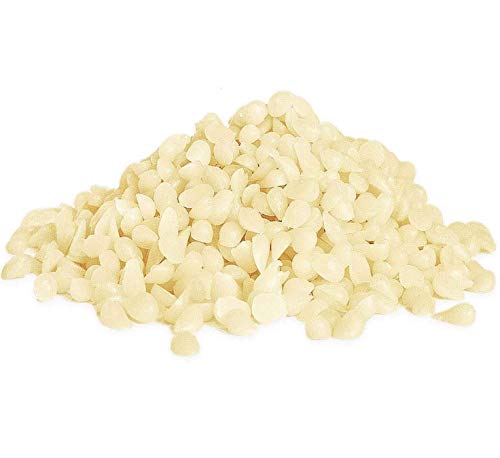
You will start with a base of wax. Soy wax and beeswax are ideal, since they are eco-friendly and natural. You can also use the soy wax for this easy DIY for how to make candles with essential oils.
Beeswax also gives off a gentle honey-like fragrance and will be more yellow (unless you source white beeswax pellets). Use wax flakes for easier melting.
Paraffin wax is also an option. It just isn’t as eco-friendly because it often is derived from petroleum.
Then the natural fragrance that comes from these sachets is limited only by your imagination! You can add whatever herbs, spices, flowers or essential oils that you would like.

For my wax sachets, I used a base of vanilla essential oil because it is a great fragrance that enhances so many spices and flowers. However, you can choose a complimentary essential oil (such as a pine essential oil with evergreen branches or rose essential oil with dried rose petals).
Again, you can add whatever you think is pretty and fragrant to your sachet. I made three different types of sachets, including:
- Rose Petal
- Orange and Cloves
- Cinnamon Cranberry
The printable recipe card for all three scents is listed below.

You might also want to consider using these fragrances:
- Pine
- Spruce
- Rosemary
- Sage
- Lavender
- Eucalyptus
- Dried Lemon
- Coffee Beans
How Long Do Wax Sachets Last?
These sachets could last about 2-3 months. The strength of fragrance is always going to depend on the strength of the essential oils, what fragrance additions you added, and where the sachet was stored.
For instance, if you stored the sachet in heat or in direct sun, the essential oils used would evaporate faster. Which means the scent won’t last as long.

I guess when the wax sachet finally loses its fragrance, perhaps you could melt down the wax again and use it to make another candle or firestarter candles? Just wondering.
Either way, these wax air fresheners are definitely zero waste because you can reuse the materials. Unlike the artificially scented hanging trees or plug-in varieties.
Other zero waste air fresheners include our simmering potpourri recipes, such as rose petal eucalyptus and lemon lavender herb. Those ingredients can be composted afterwards.
Best Molds for Wax Sachets
I like the molds that have a hole built into the mold. That way, when it’s dry I can just add a ribbon, without having to worry about poking a hole through the dried wax.

These circular molds have two circular shapes – ones that look like wreaths as well as solid circles (and here’s a mini version of the same molds), while these molds are rectangles.
You can always use any type of soap molds for the sachets. Using a solid soap mold with no hole is perfect if you plan on adding the sachet into a drawer, placing in a bowl, or putting in a muslin bag to hang.
Helpful Tips
These are so easy to make. Here are a few helpful tricks to make it even easier:
- Use a dedicated crafting or candle-making pot to melt the wax. You don’t want to use a pot you cook food in. You can also use a double boiler to more gently melt the wax flakes so that you don’t accidentally burn the wax if it comes to boiling.
- Don’t add the essential oils at the beginning of the wax melting process. You want to wait until the wax is melted and just starting to cool before adding them in. Essential oils can lose their potency with heat, so you want to add them at the last possible moment so that their scent stays as strong as possible.
- You can place the flowers, herbs and spices on just one side of the wax sachet, or both sides. If you’d like on both, be sure to place additional items on top of the hot wax after in the mold.
- Twine makes a simple, rustic hanger for these sachets. Or use a thick ribbon for a dramatic, elegant touch.

DIY Wax Sachets
Easy to make wax air fresheners (also called wax sachets) just use a few ingredients but will fragrance your home, closet or car for months. Makes perfect scented Christmas ornaments, too!
Materials
- ½ lb. wax pellets (soy or beeswax)
- 10 drops of essential oil (I used a vanilla blend)
- String
- Wax mold
Orange Clove Wax Sachets
- 1 Dried orange and/or orange peel
- ¼ cup cloves
Rose Petal Wax Sachets
- ½ cup dried rose petals
Cinnamon Cranberry Wax Sachets
- 3-4 cinnamon sticks
- ½ cup dried cranberries
Instructions
- In a heavy sauce pan melt the wax over medium heat. Keep a careful eye on it, so that it doesn’t boil. (About 5-6 minutes, but will vary.)
- Place fragrant items on the bottom of the mold. Arrange as you'd like them to appear in the wax.
- Add in essential oils to the hot wax
- Pour wax into the molds. Be aware that the wax is hot, and use caution.
- Allow the wax to set for a few hours or preferably overnight.
- Tie a string on the mold to hang.
Notes
- The molds that I recommend create a hole in the disk to hang from. If you are using another type of mold, be sure to make a hole in the wax.
- When using fresh ingredients, such as cranberries, keep in mind that those items can spoil over time. This would not be an air freshener to hide in the closet for a few months.
- You can also add fragrant items to the top of the wax once poured into the molds. Do NOT touch hot wax! Use tongs to place in the liquid, or just drop in the items.
Recommended Products
As an Amazon Associate I earn from qualifying purchases. I earn from other affiliate programs, as well.


Be sure to Pin This DIY Project so that you don’t forget it! Add it to your favorite craft or Christmas boards.

Grace
Friday 3rd of November 2023
i noticed when i poke a hole my sachet is cracking. How can I avoid this?
Kimberly
Saturday 4th of November 2023
I would suggest adding the hole when the mixture has started to harden somewhat. Don't wait until it is completely hardened to poke a hole in it.
Neha Mehra
Sunday 1st of August 2021
If we hang it in car does it melt if car in in sun or there is a high temperature outside.Also if we hang it in our wardrobe closet will it melt nd spoil our clothes with the colour nd wax used???
Please answer
Kimberly Button
Monday 2nd of August 2021
I would not hang in the car. It can melt. It should be fine in your closet unless the temperature in the closet gets very warm.