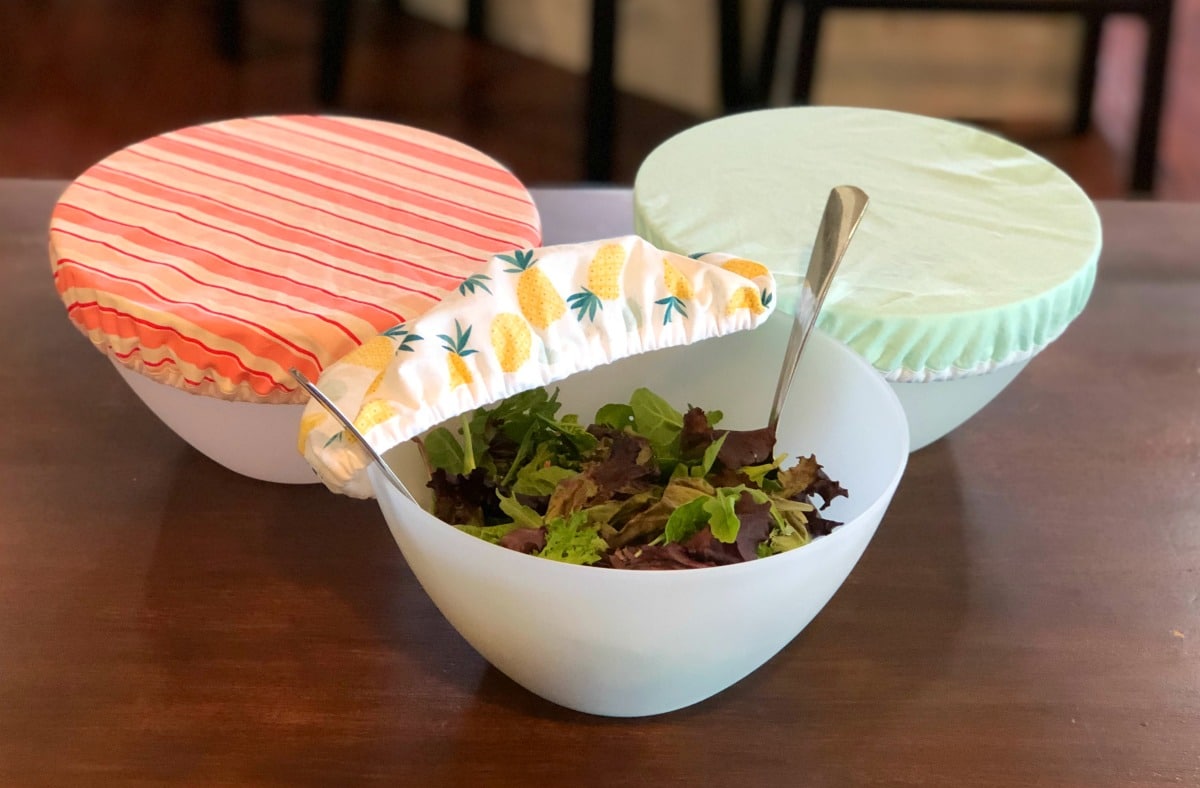
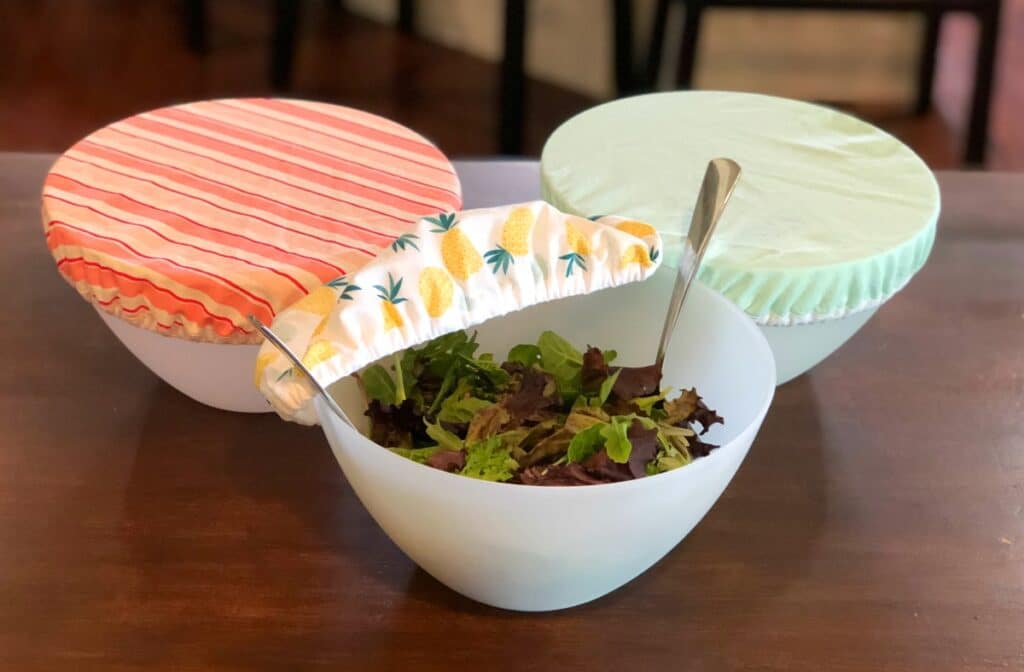
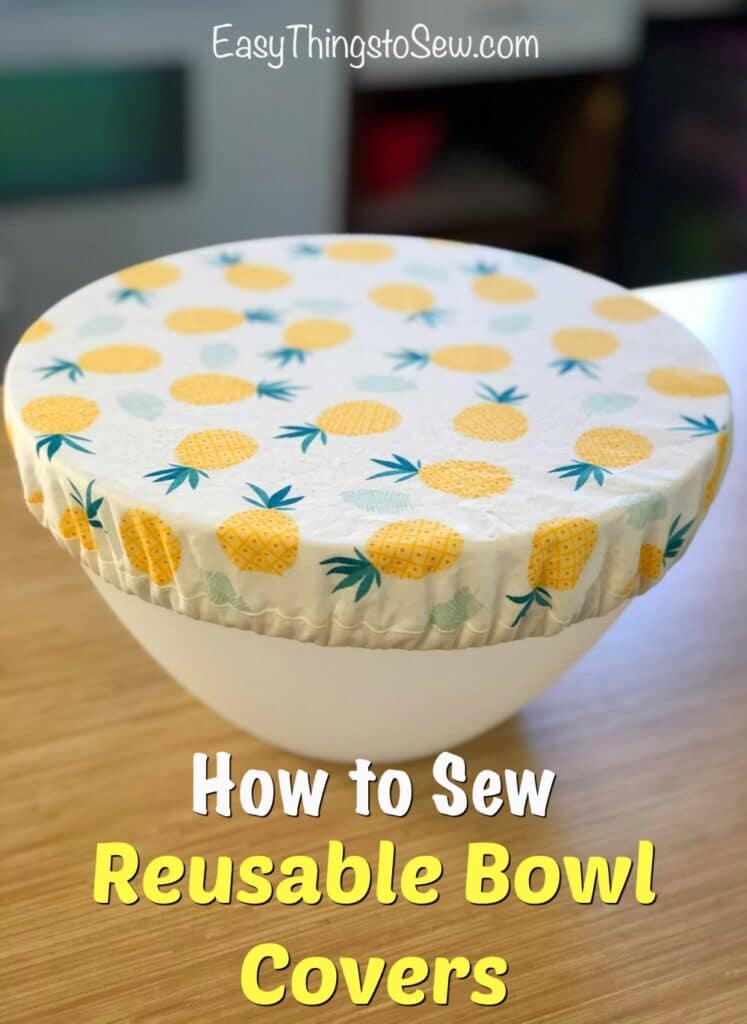
Reusable Bowl Cover
This DIY reusable bowl cover pattern will show you how to make your own fabric covers to save money and stop using plastic wrap.
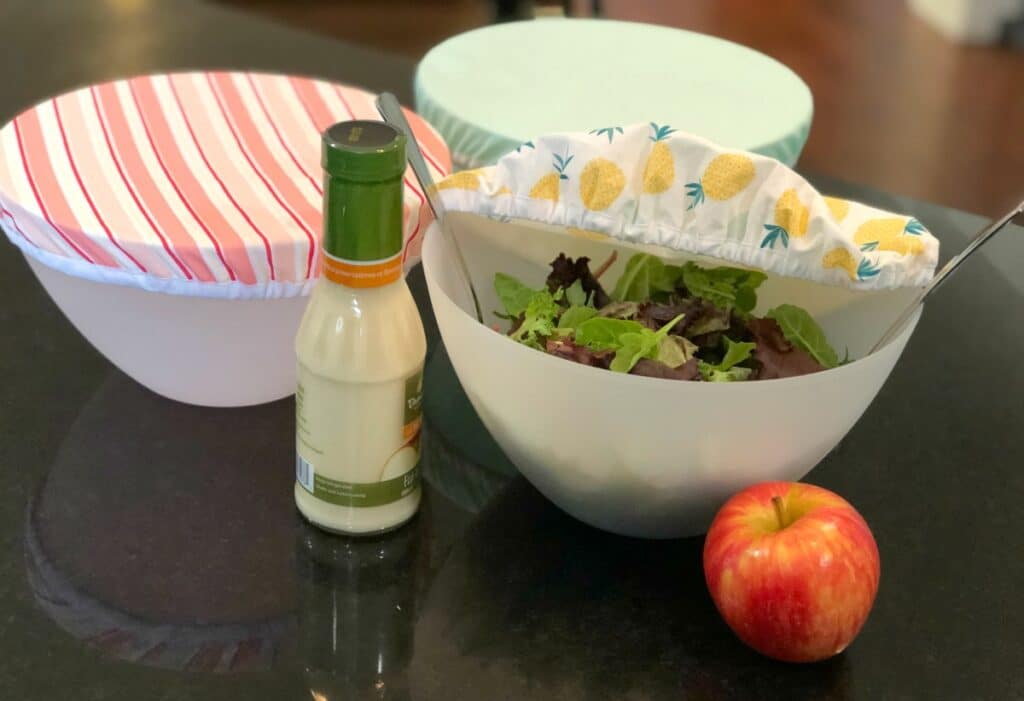
This fabric bowl cover pattern is a little more detailed than many of our craft patterns. But it’s still an easy thing to sew.
Don’t worry. We have picture tutorials for every step!
Be sure to pick fabric colors that match your kitchen decor!
These are great to make for gifts, as well. And consider making these to sell at craft fairs, where they will do well.
You might also like our other zero waste craft tutorials:
Materials
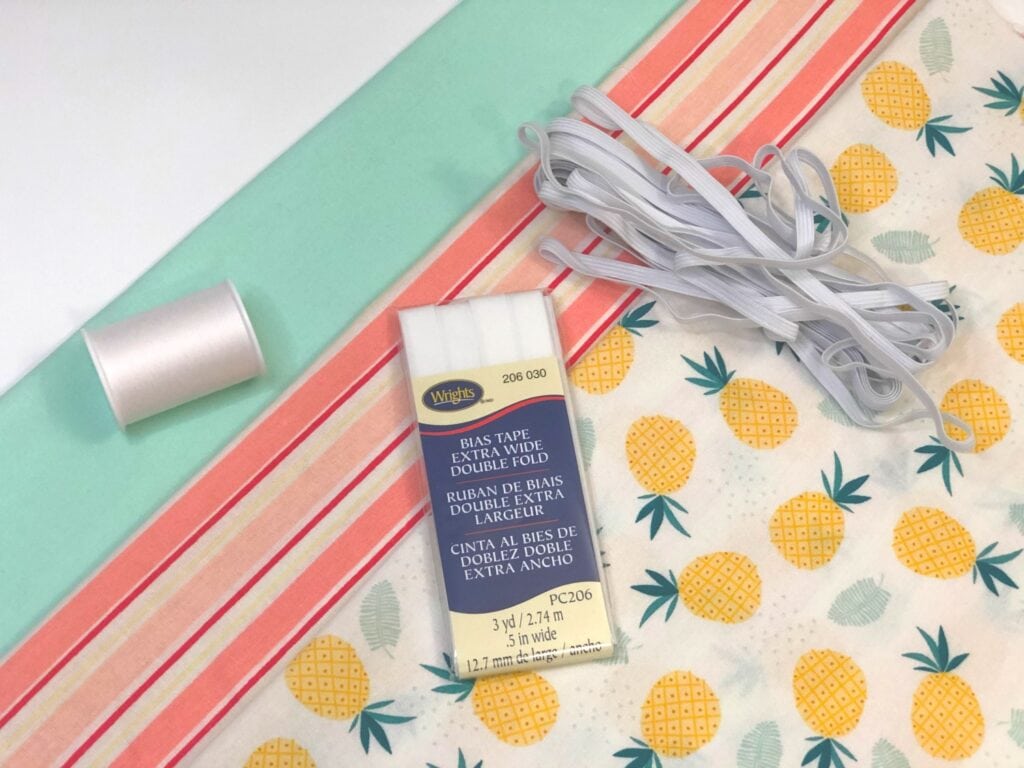
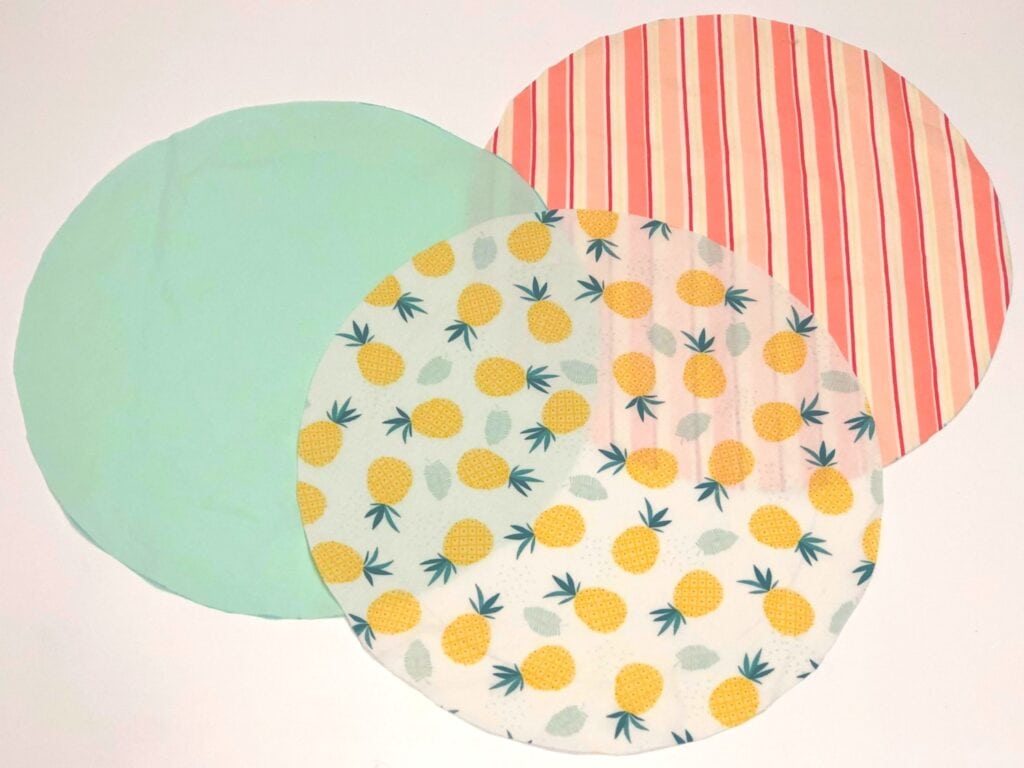
- Fabric quarters (choose how many you’ll need – I made 3) in coordinating fabrics or oil cloth
- Thread
- Scissors
- Marking utensil (pen, pencil, laundry marker)
- Bowl(s)
- ¼” white elastic
- Bias tape (extra wide double fold) in color of your choice
- Pins or clips
- Safety pin
- Iron/ironing board
- Sewing machine
Directions for Making a Reusable Bowl Cover
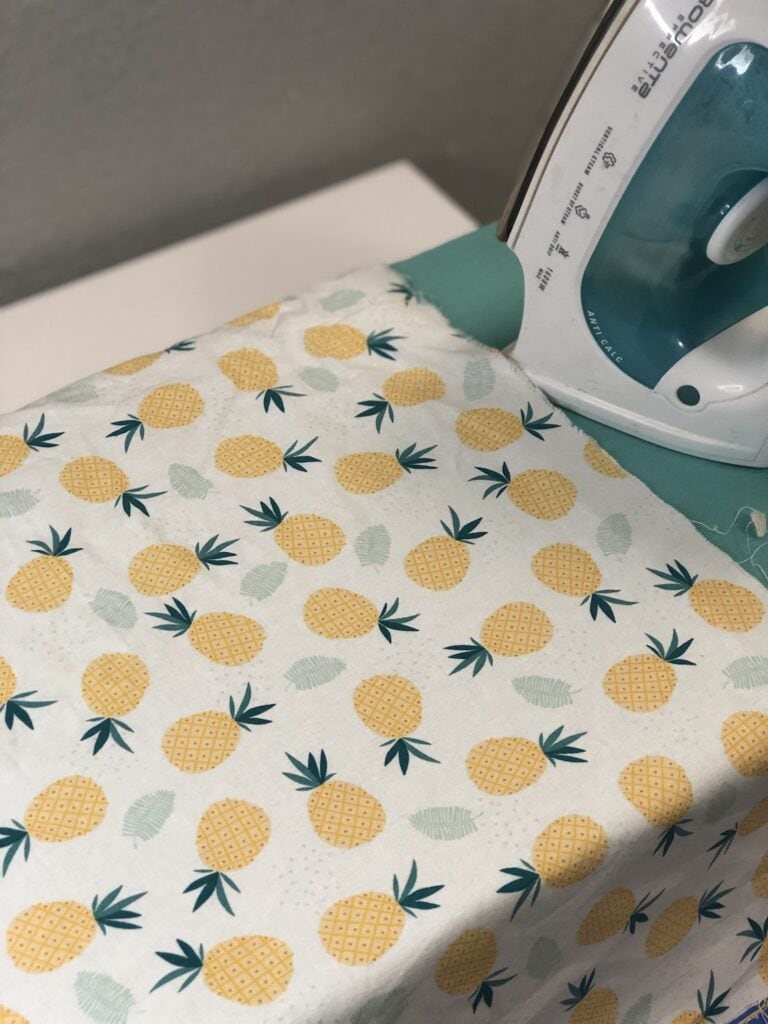
1. Wash, dry and iron the fabric.
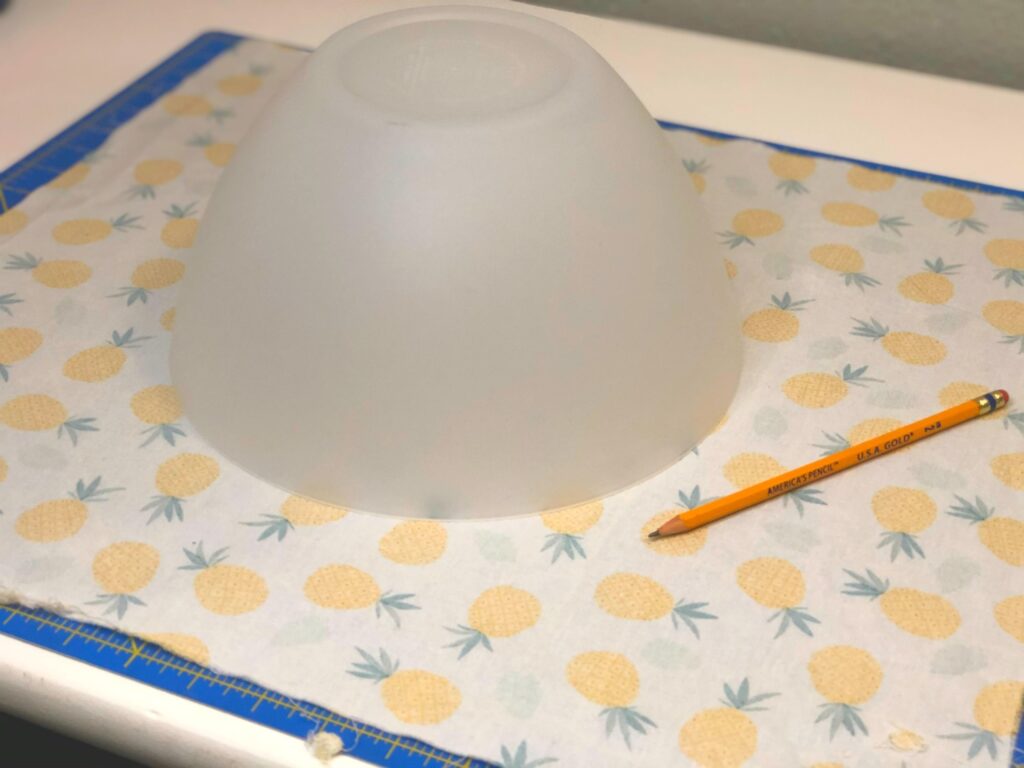
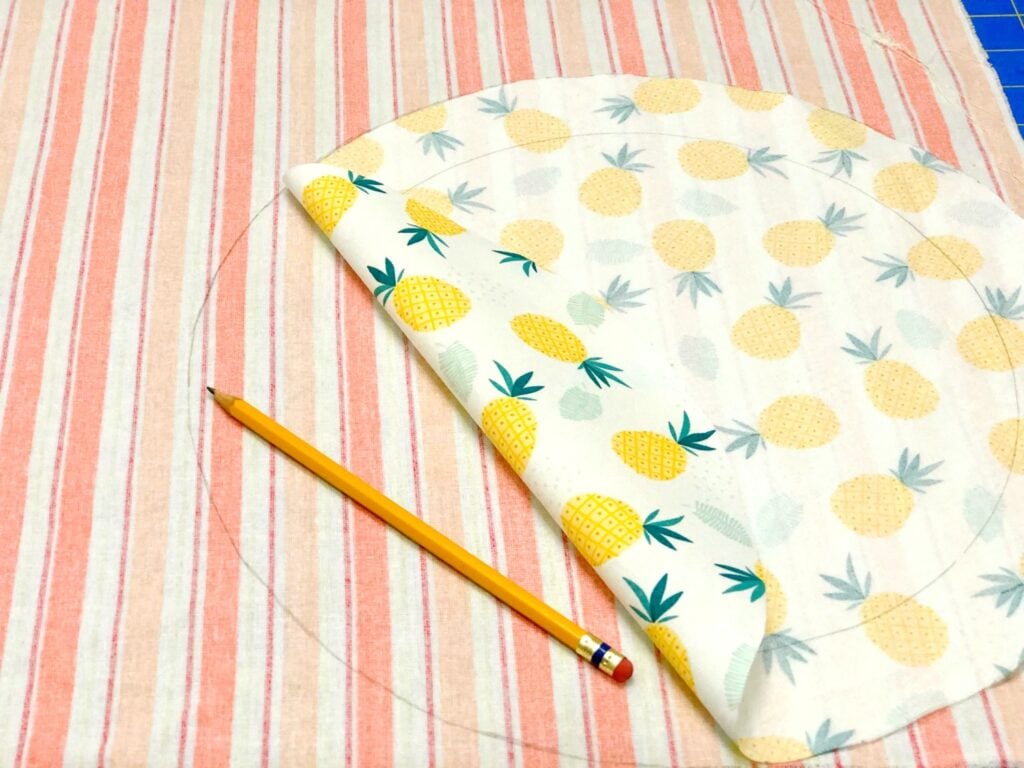
2. Lay the fabric face down. Place your bowl face down on the wrong side of the fabric and trace around the bowl lightly. Be sure the pattern is what you want it to look like on the other side! Remove bowl.
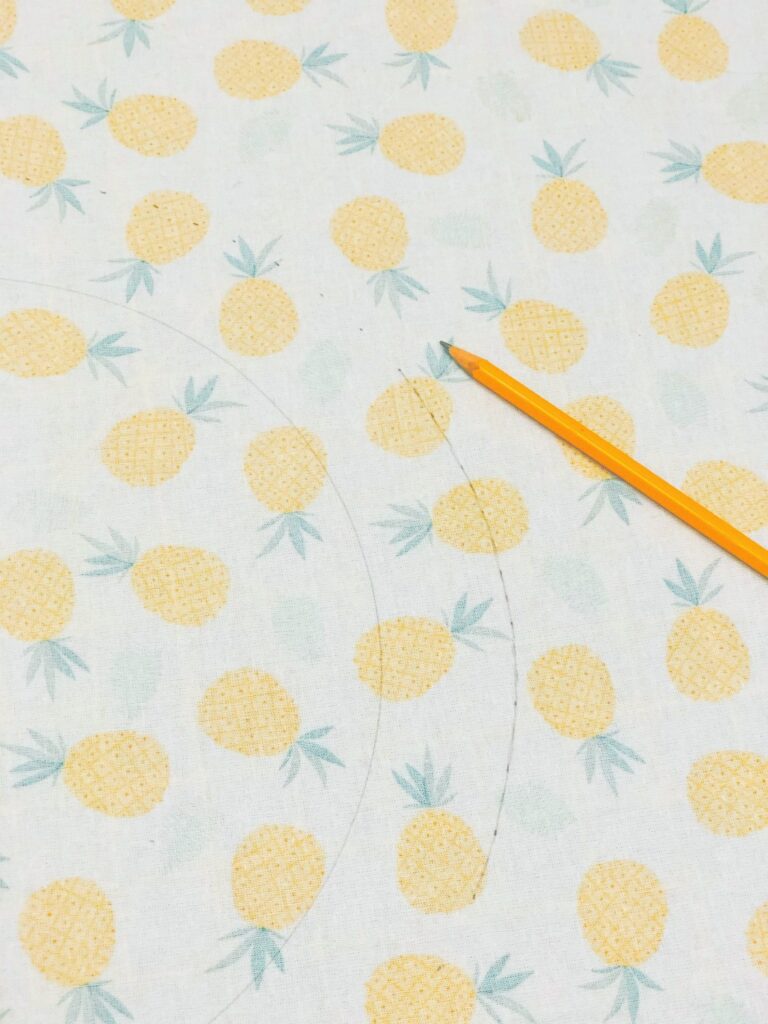
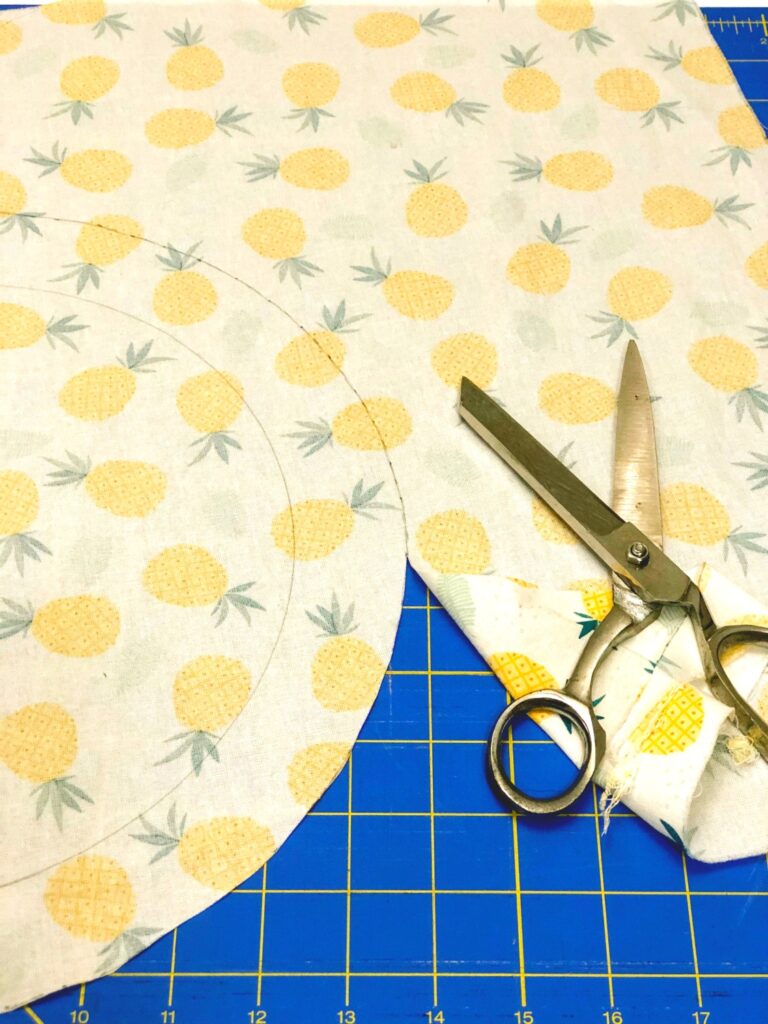
3. Measure and make several small marks 1 ¼ inch away from the line you drew all the way around the circle.

4. Connect your small marks together to form a bigger circle. This can be “eyeballed” as the raw edge won’t show in the final cover.
5. Cut the larger circle out using sharp sewing scissors.
*If you are making multiple bowl covers for the same size bowl, simply trace the cut circle onto the other fabric choices. This will save you the time of tracing around the bowl again.
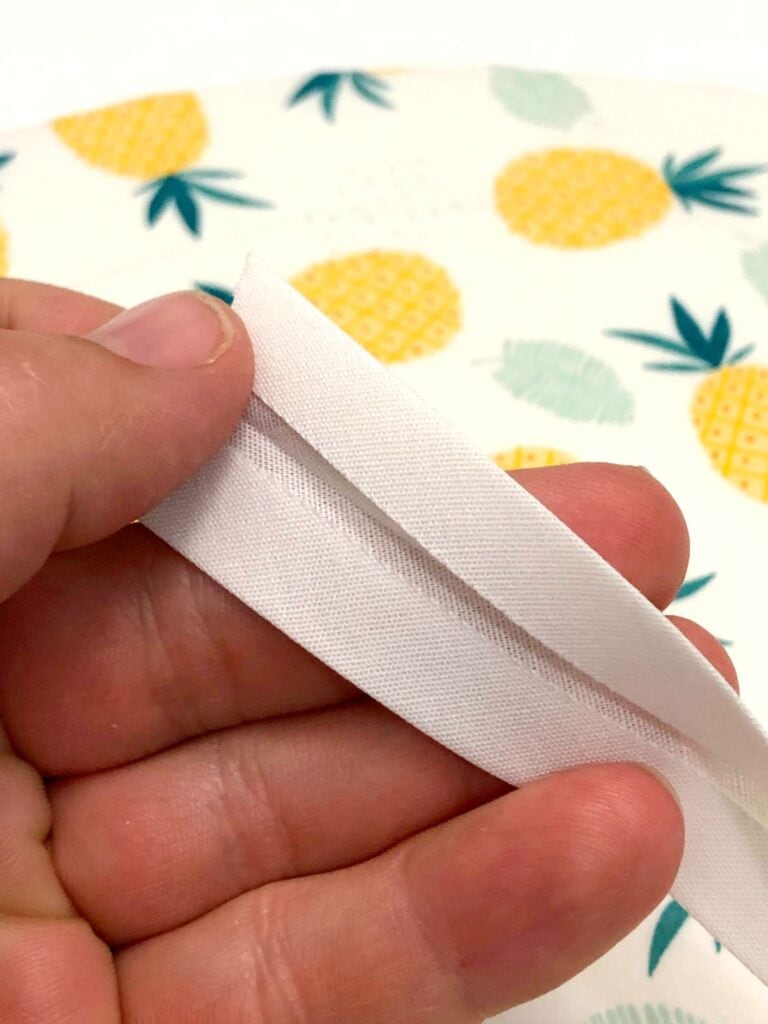
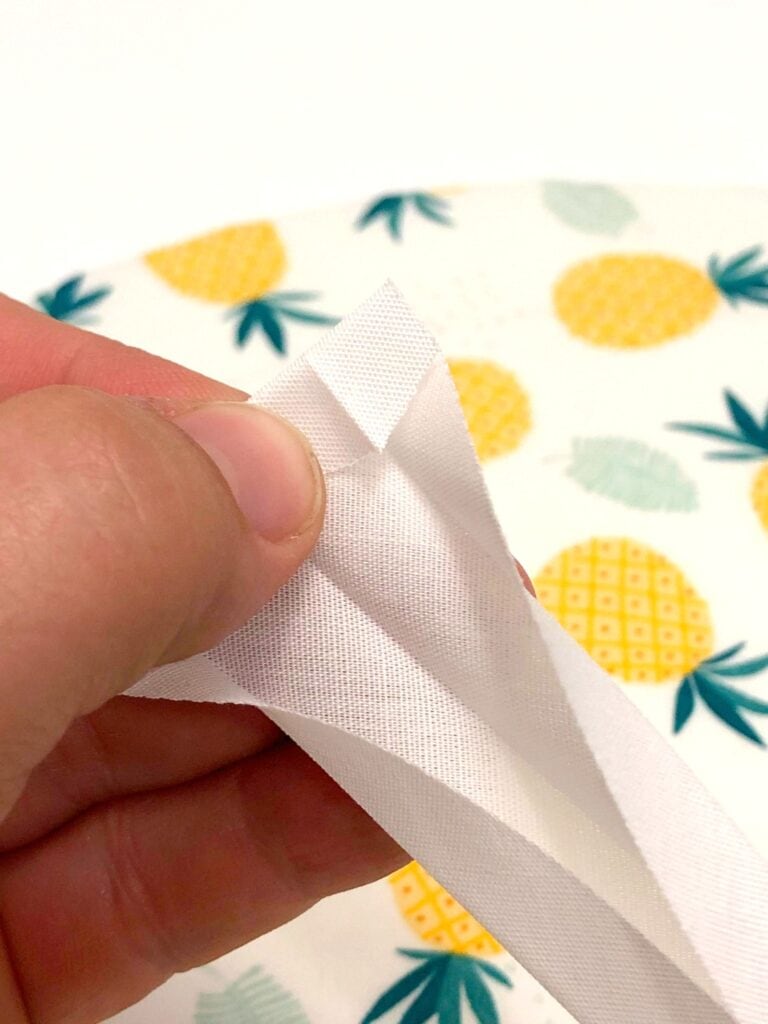
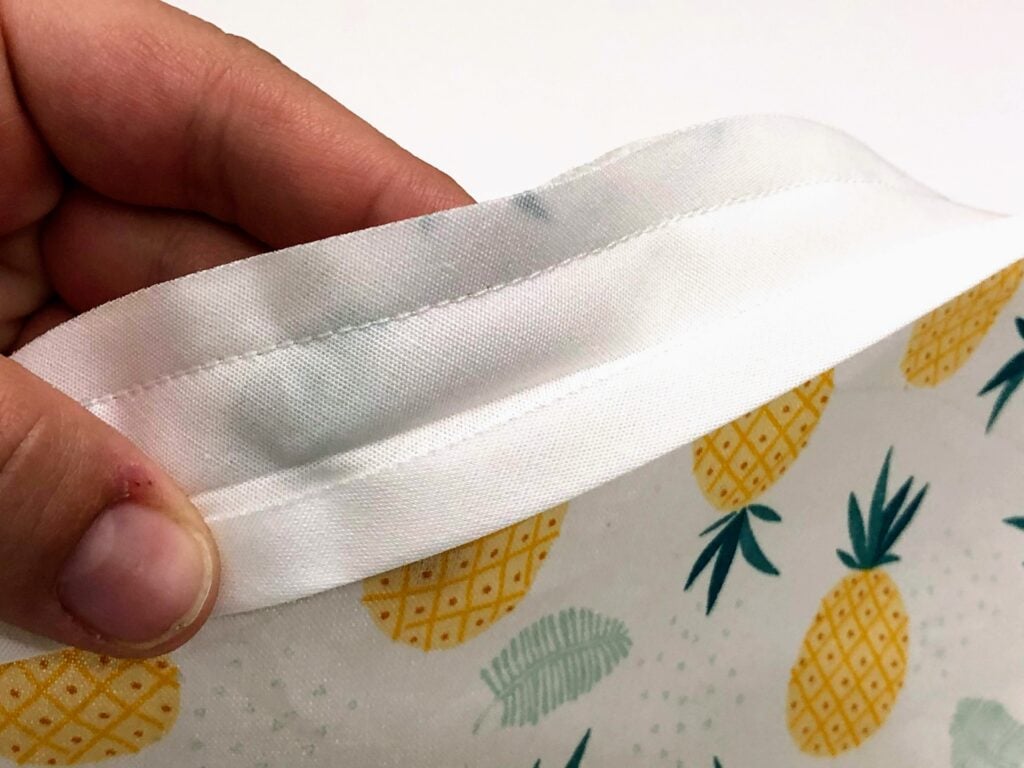
6. Now we need to add the bias tape. You’ll notice upon closely looking at the bias tape that it has one side that is slightly narrower than the other.

7. Unfold the narrower side of bias tape to reveal raw edge.
8. Fold in the very end of the bias tape slightly to create a clean edge once finished.
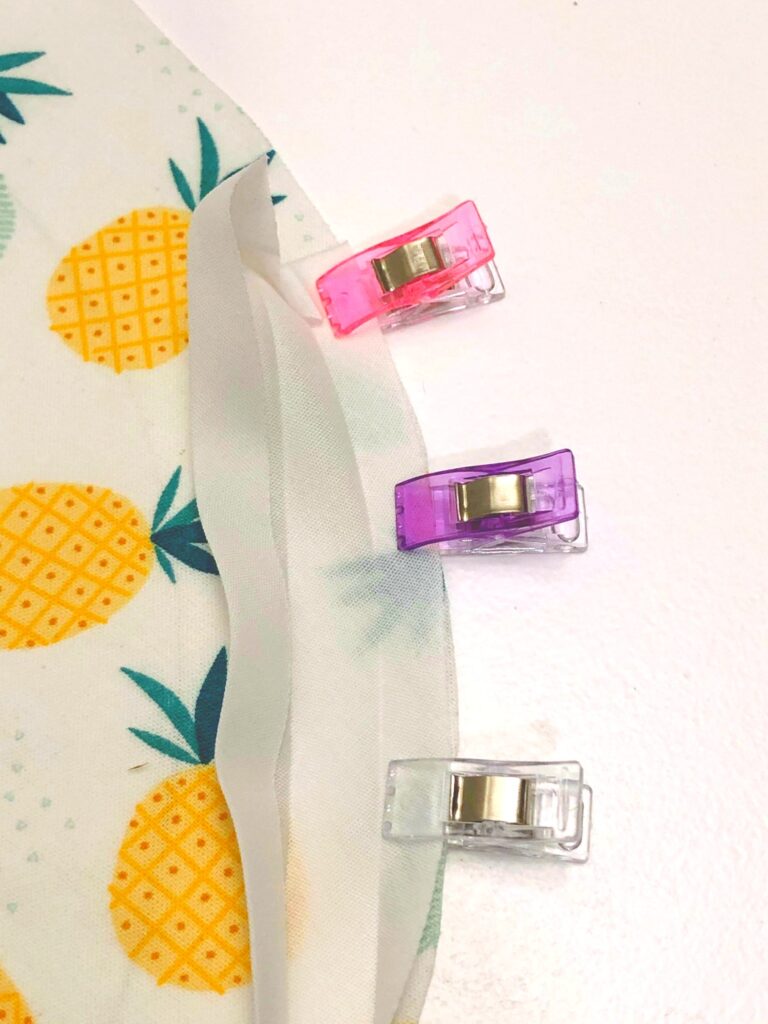
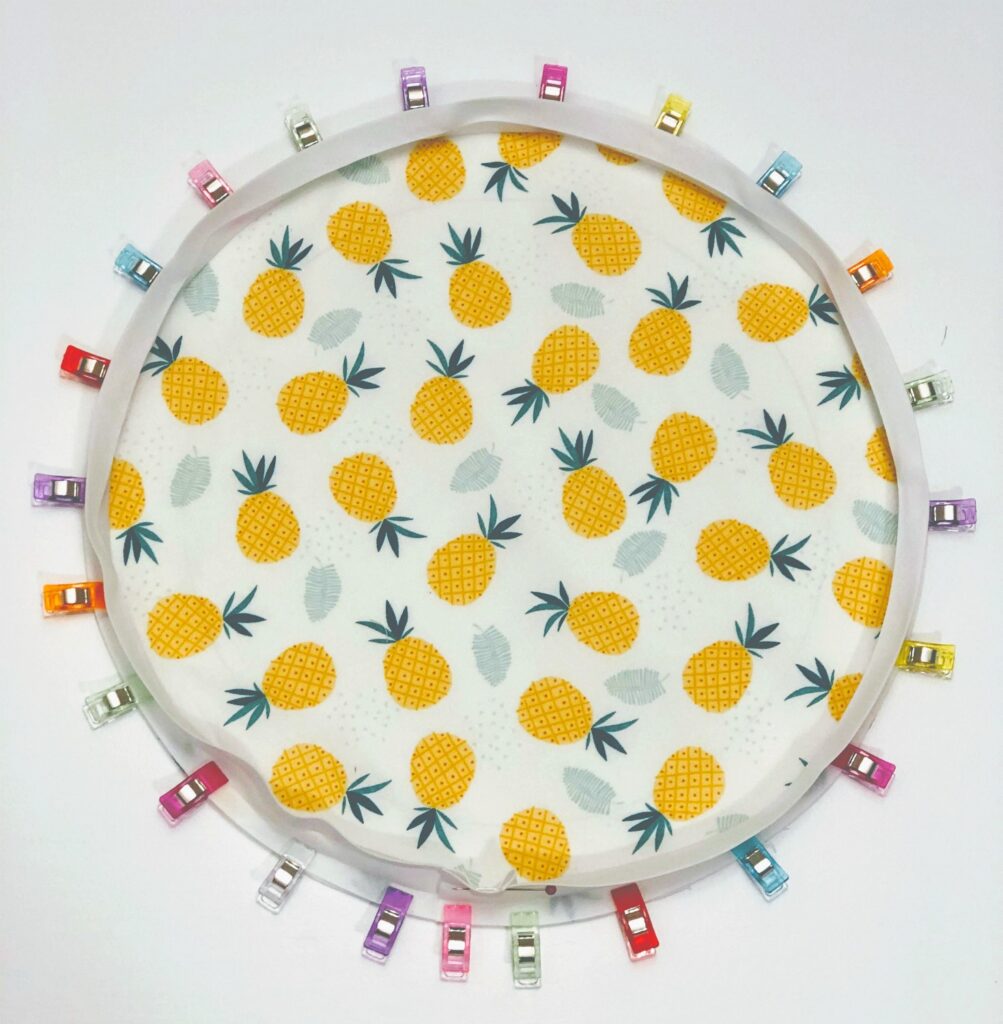
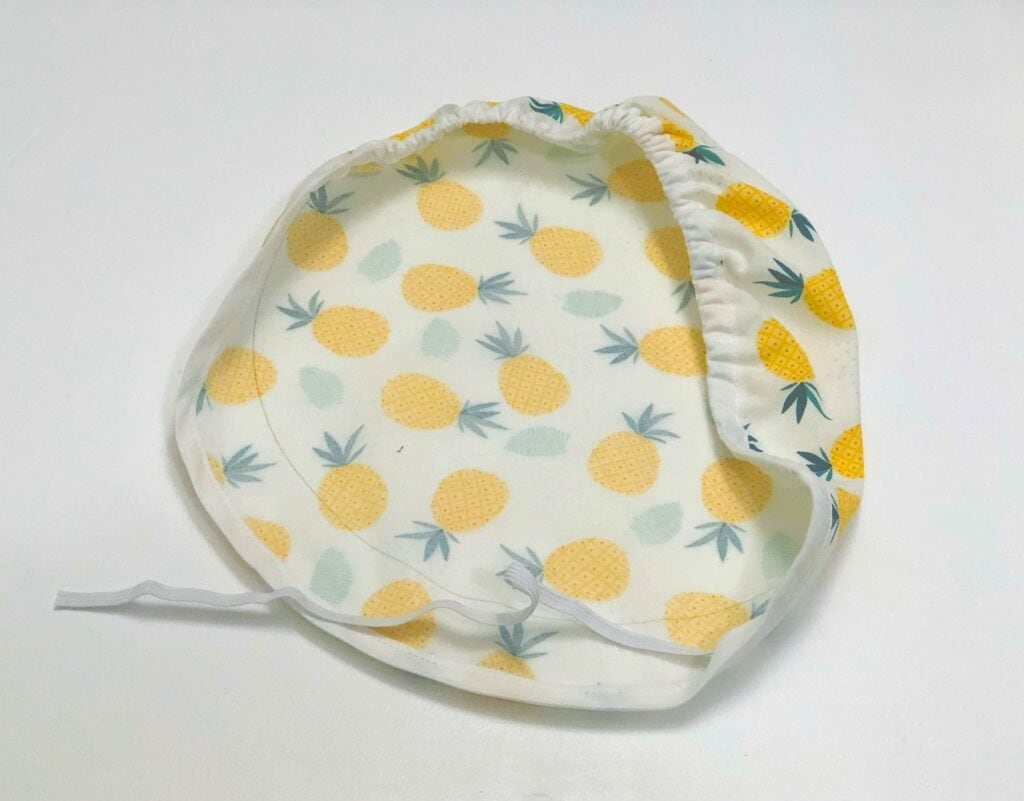
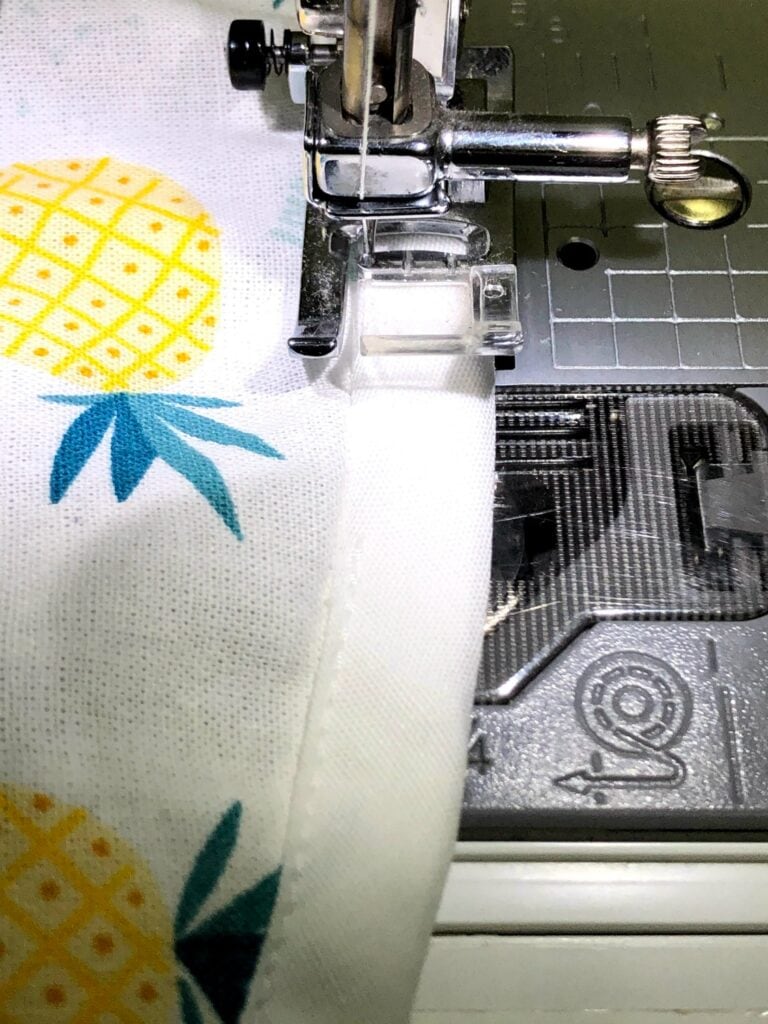
9. With the fabric now facing right side up, line the inside raw edge of the bias tape up to the edge of your cut circle of fabric (see photo). Curving the bias tape as you go, pin or clip every inch or so all the way around the circle. Overlap the edges just a bit (about ½”) when you get to the end and trim off excess.
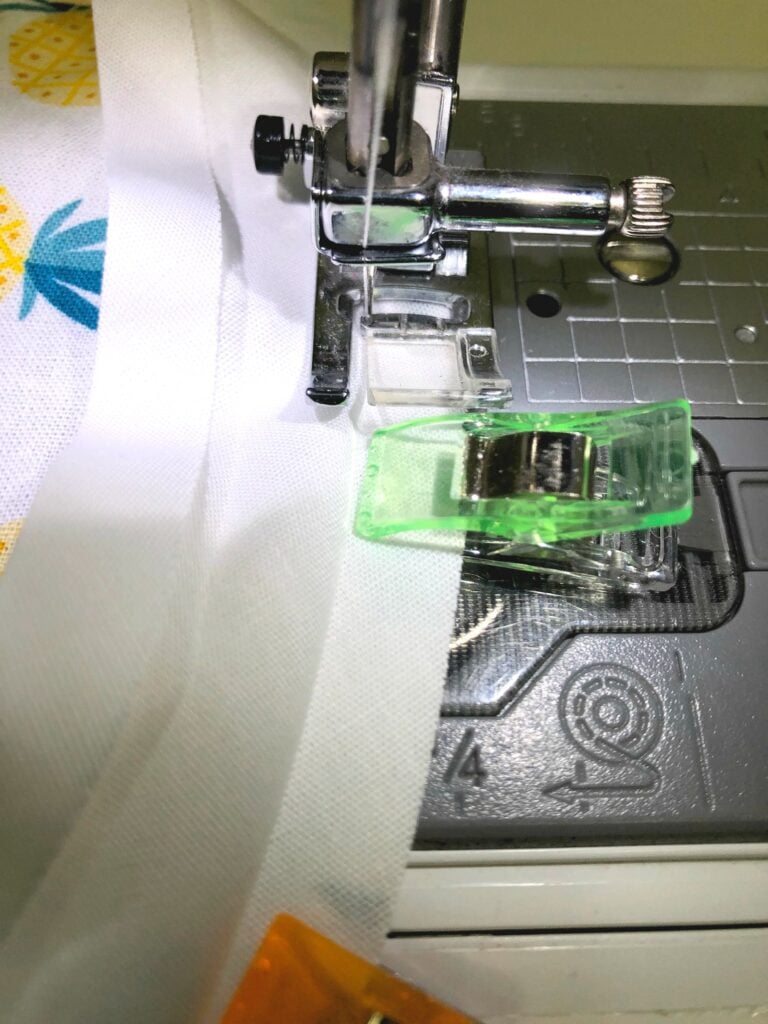
10. Using your sewing machine, stitch along the pre-made crease in the bias tape (this is about ¼” in from the edge) around the whole circle, removing pins or clips as you go. Be sure to backstitch at the beginning and end of your stitching.
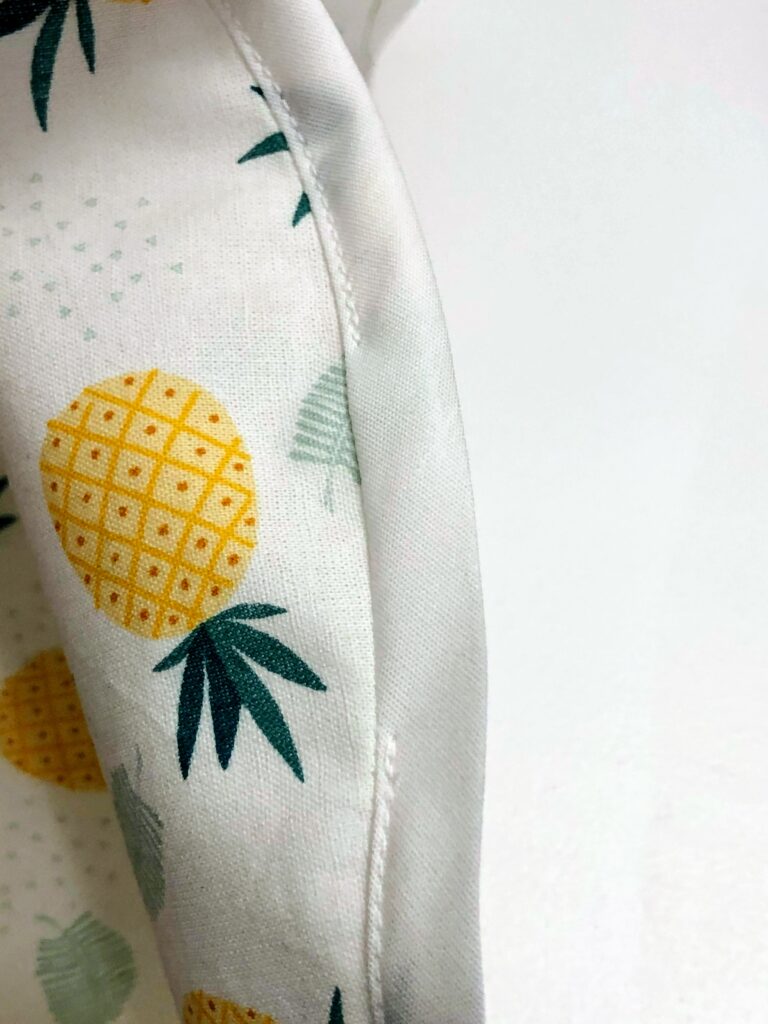
11. Next, tuck in the raw edges of the fabric and bias tape and fold the bias tape down. Be sure the bias tape and fabric inside are laying flat, then press to reinforce the creases. Add a few pins or clips to hold.

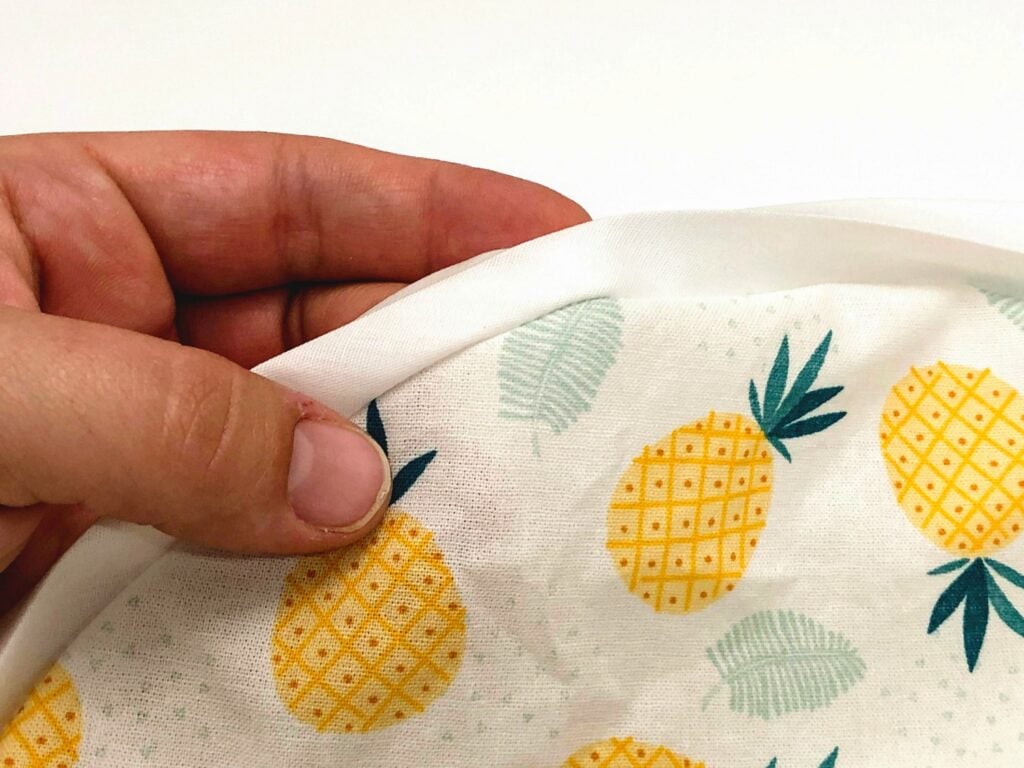
12. Using your sewing machine, top stitch on the bias tape around the circle extremely close to the edge of where the fabric meets the bias tape. Leave an opening that is about 1.5” wide.
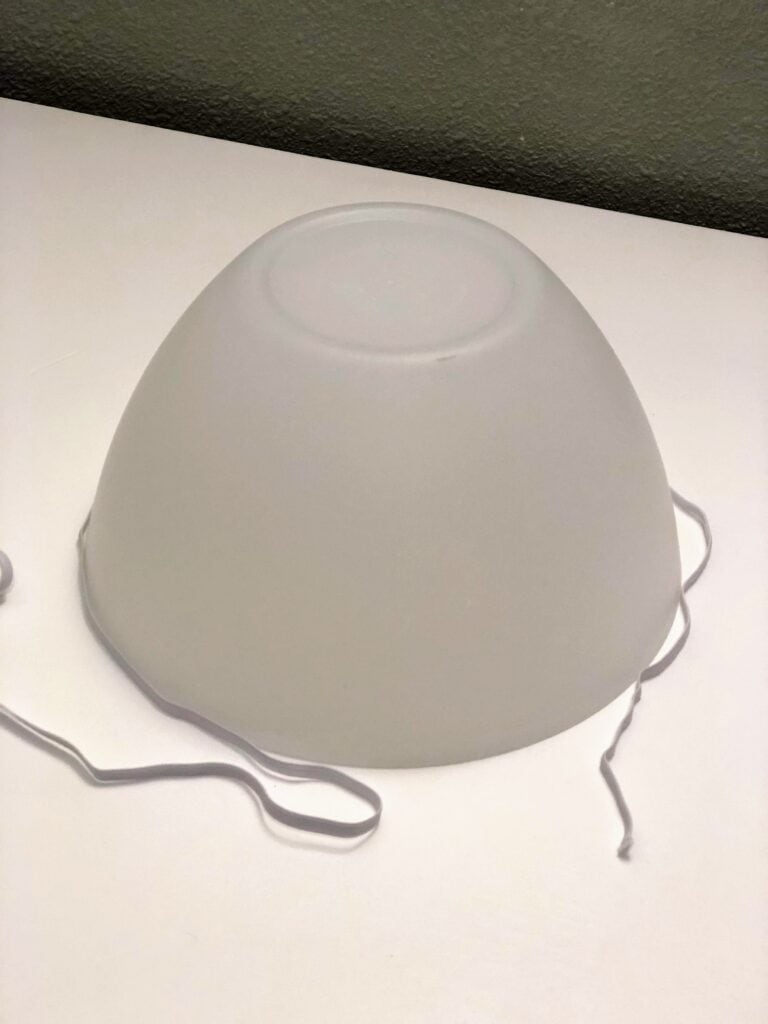
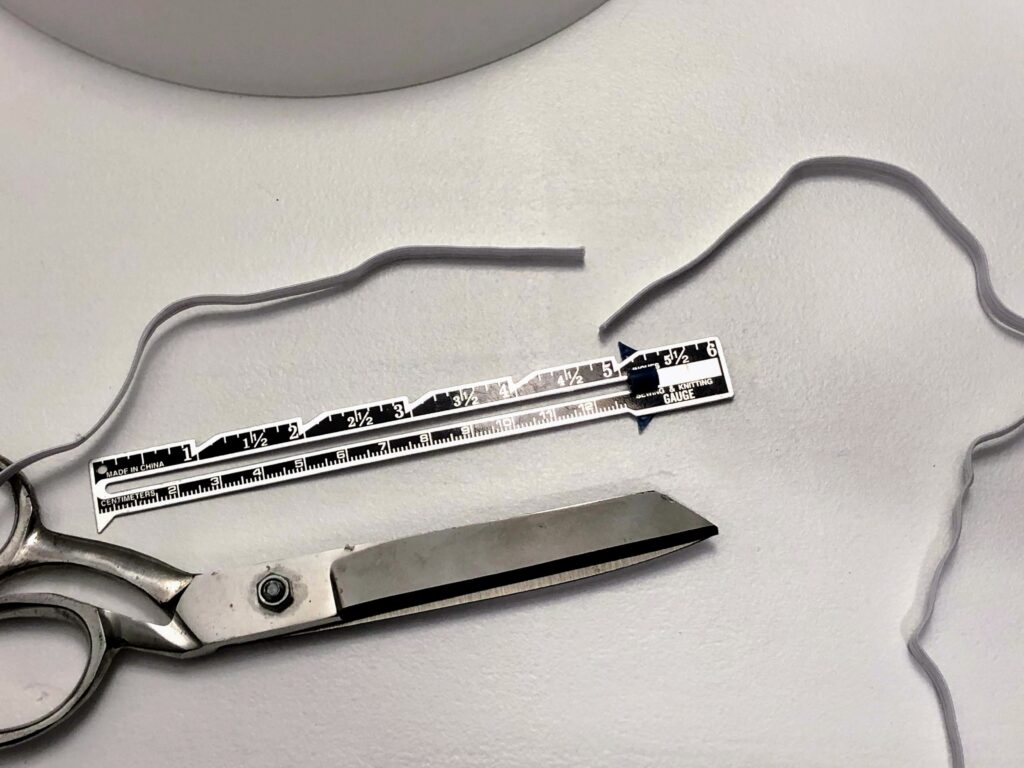
13. Now we need to measure the elastic. With your bowl face down, lay the elastic around the rim at the bottom. Then subtract 4 or 5 inches and cut the elastic.
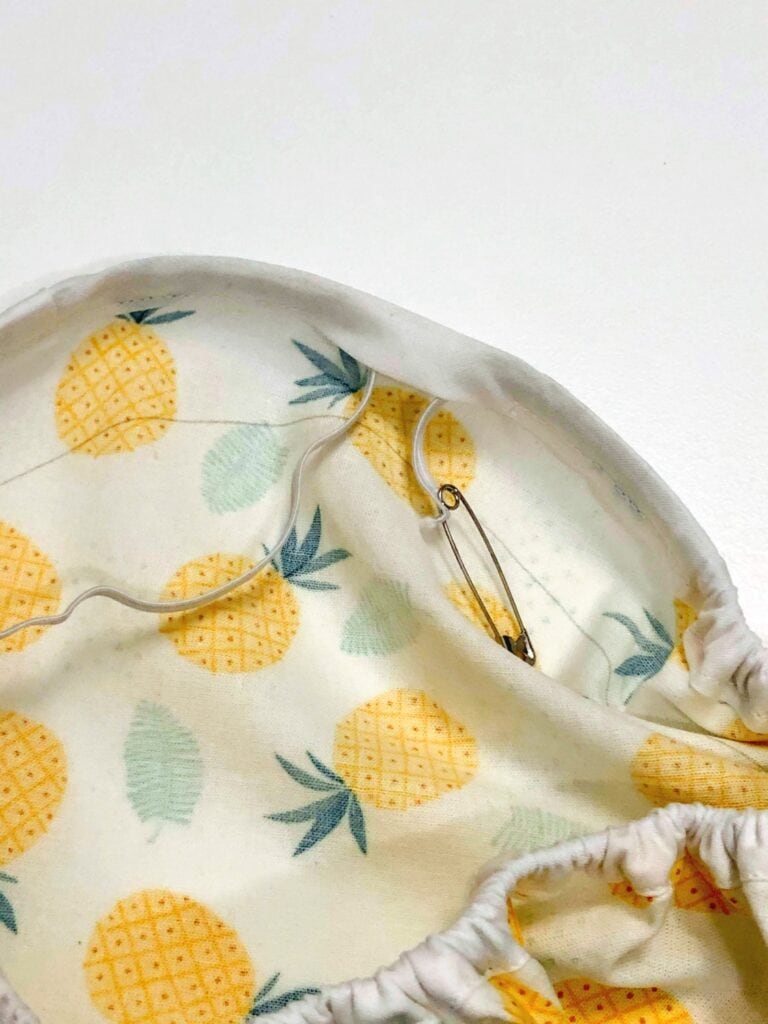
14. Insert a safety pin into one end of the elastic.
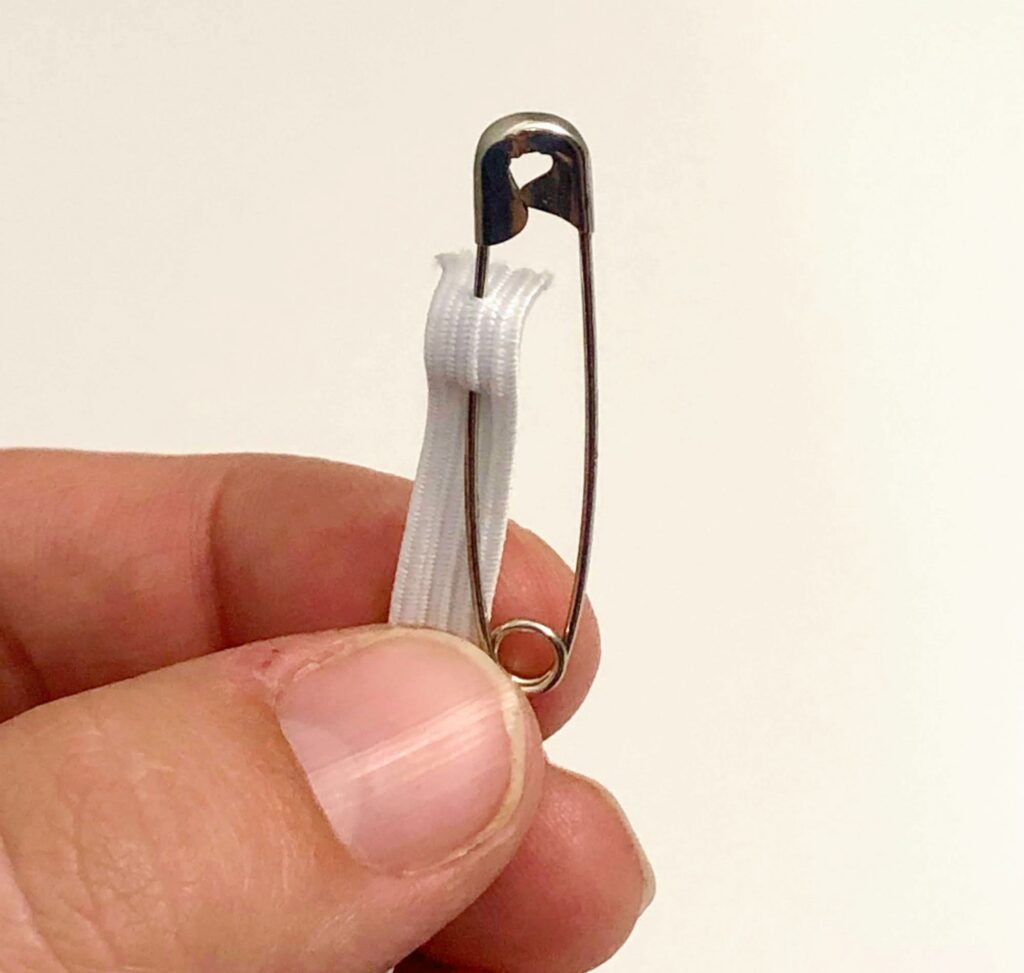
15. Put the safety pin end of elastic into the bias tape casing you created on the underside of the fabric. Continue feeding the elastic into the casing until you reach the other end of the circle at the opening.
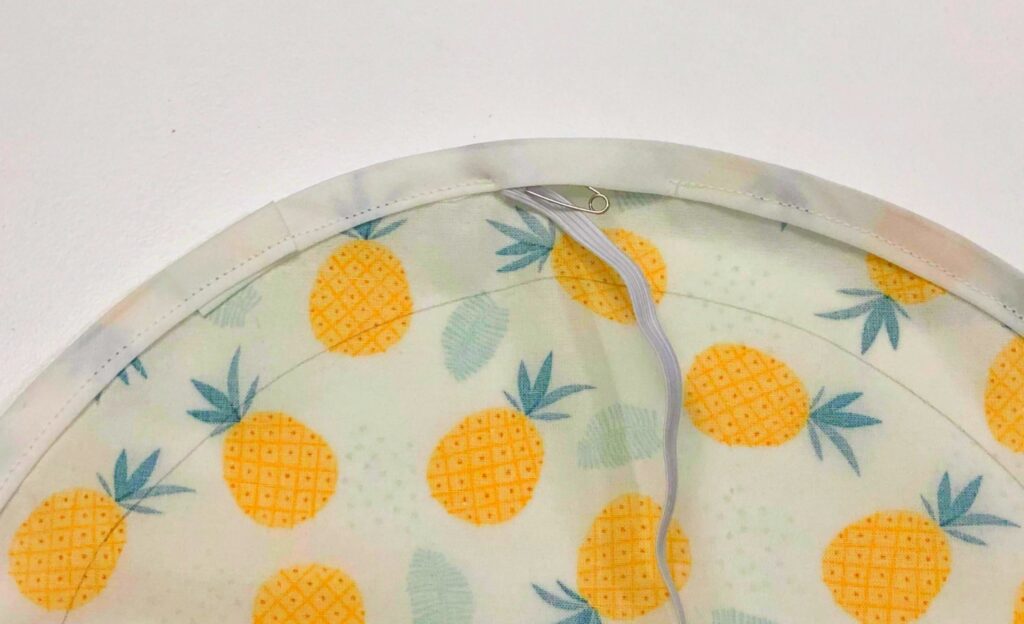
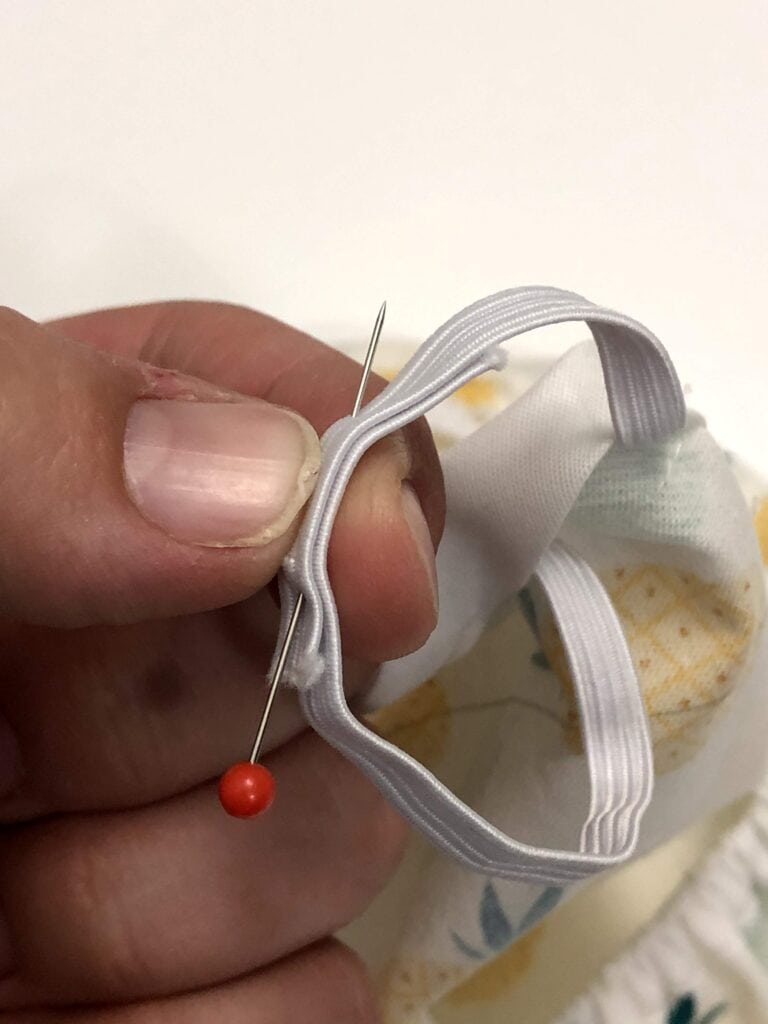
16. Overlap the two ends of elastic by about an inch and stitch them together with a zig zag stitch (you will need to adjust your stitch width to match the size of the elastic). Tuck the elastic all the way into the casing and ensure it lays flat along the opening.

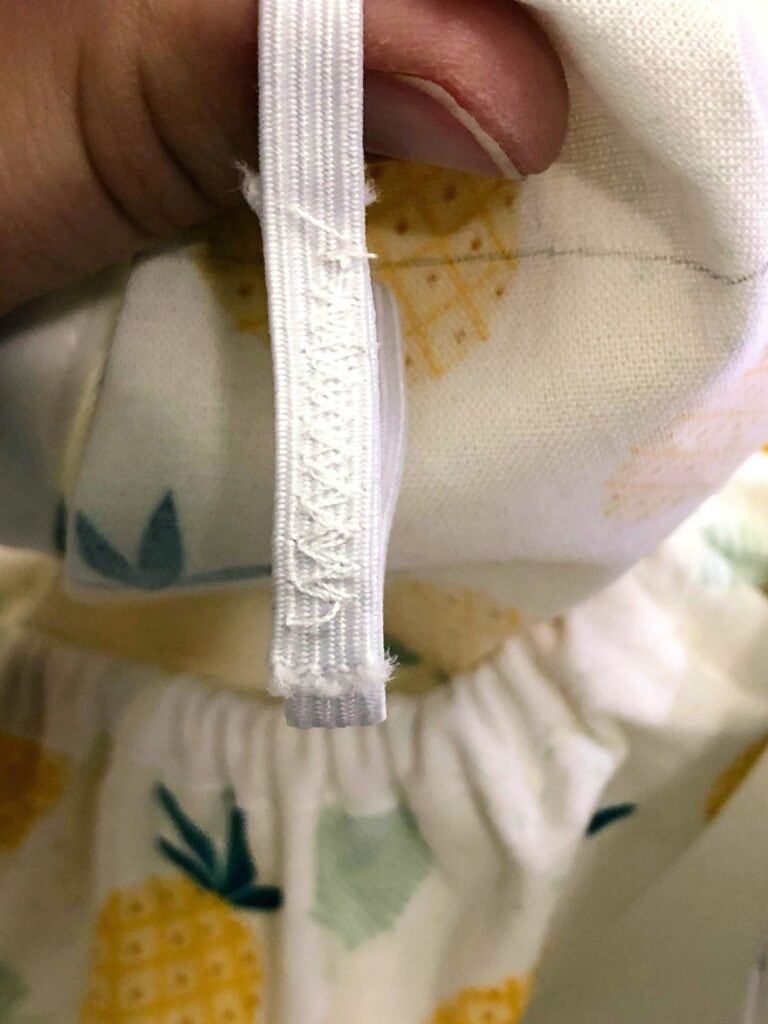
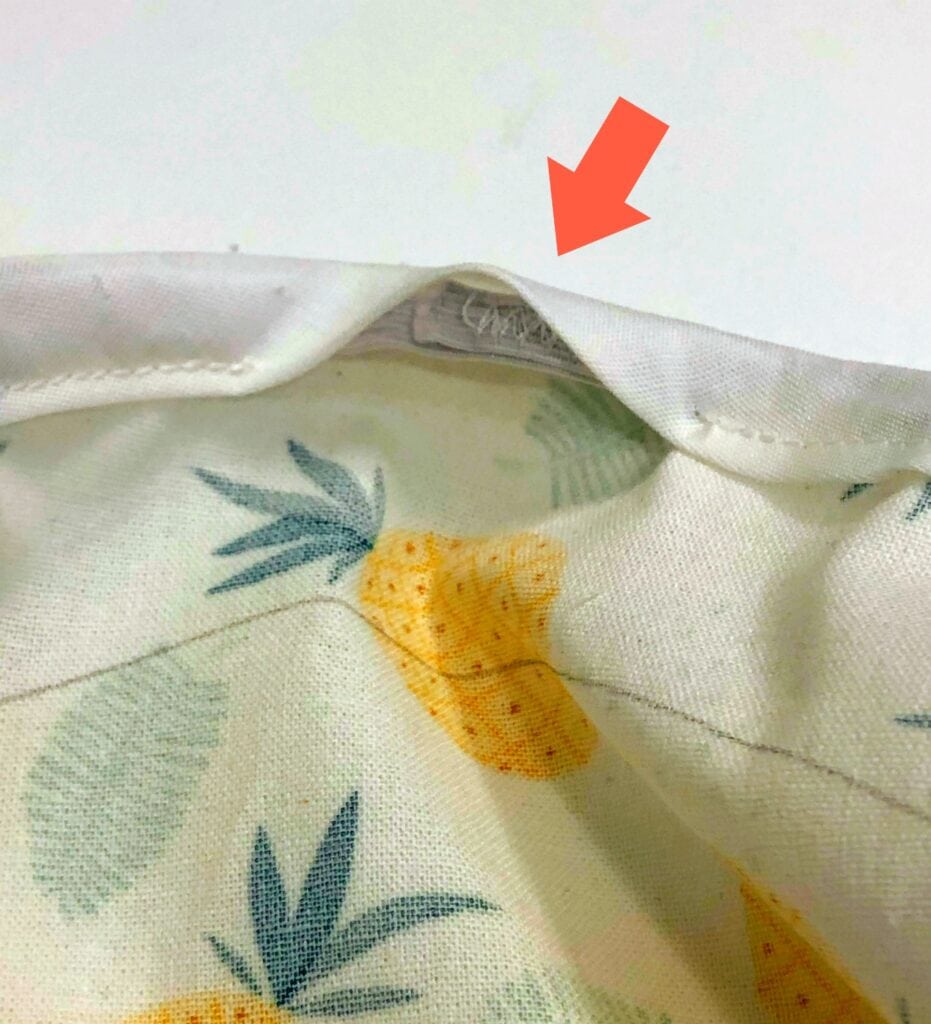
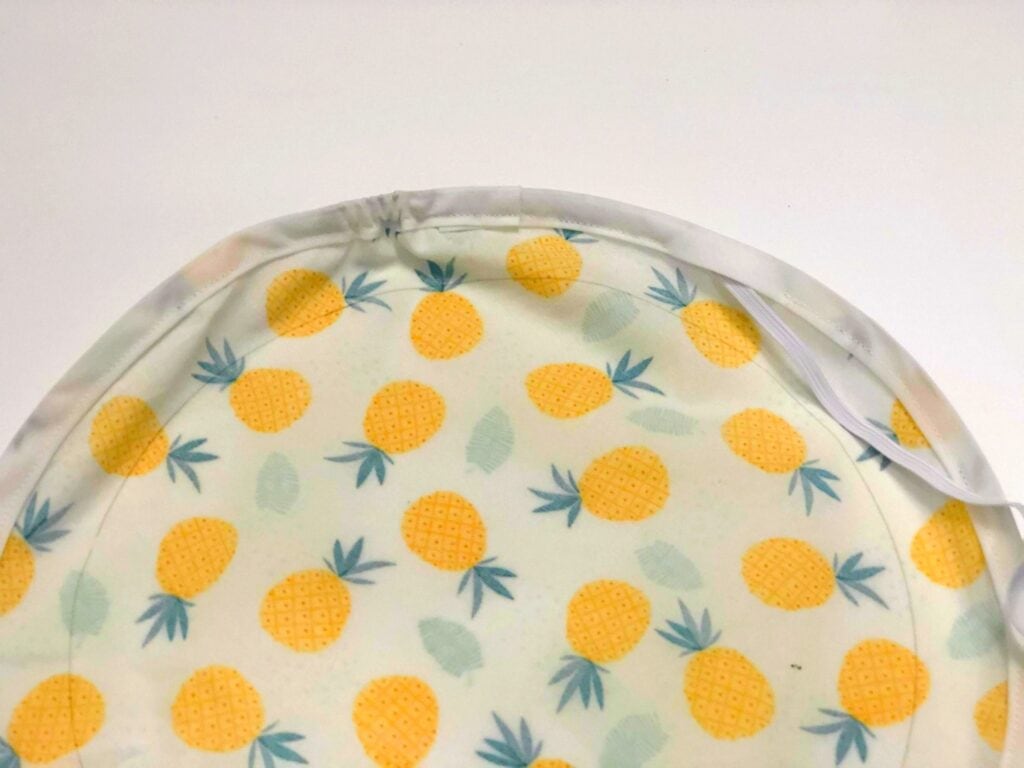
17. Top stitch the opening of casing shut, backstitching at the beginning and end of your tiny seam.
18. Repeat the process for the desired number of bowl covers.
Be sure to Pin This project to save for later!
Another easy zero-waste sewing project is our cute turtle mops! They are perfect for picking up spills on the floor.
Want more easy sewing crafts? Check out our DIY Bath Scrubbies. And for your pets, here’s how to sew a dog bandana.